
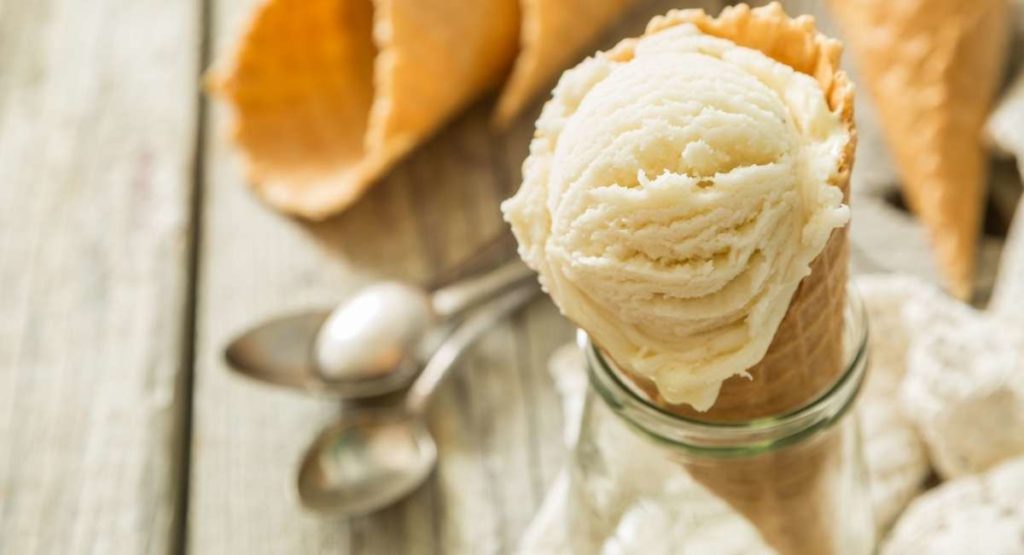
This Vegan Vanilla Ice Cream Recipe is a classic favorite with only 5 simple ingredients: cashews, coconut milk, vanilla, sugar, and salt. It features a nutty flavor with a perfectly smooth texture that y’all shouldn’t miss. Plus, it’s vegan and gluten-free too!

Cashews are rich in fiber, good fats, healthy plant-based protein, and minerals that are good for the brain, bones, and immune system. They’re also low in sugar and calories. In fact, this recipe only provides 9 grams of sugar and 175 calories per serving– a guilt-free treat indeed!
This recipe calls for an ice cream maker though. However, if you don’t have access to one, you can simply freeze the mixture while mixing it every 20 minutes until it’s firm enough to scoop. And although this could take some time, it’s totally worth it!
You also won’t have to make the dreaded creme Anglaise on the stovetop as you may simply mix all the ingredients in the blender and you’re good to go. This best blender for frozen drinks might be handy; but, if you’re in search of one that can double as a food processor, this guide suits you best. Without further ado, here’s the recipe that you and your family will surely love! Enjoy!

Vegan Vanilla Ice Cream
Equipment
- ice cream maker
Ingredients
- 1 cup raw cashews soaked in water overnight drained
- 27 ounces full-fat coconut milk
- 1 tablespoon vanilla bean paste or vanilla extract or 1 vanilla bean
- ⅔ cup cane sugar
- ½ teaspoon sea salt
Instructions
- Make sure that your cashews are completely soaked overnight. Also, ensure that the base of your ice cream maker is in the freezer for at least 7 to 24 hours (preferably 24 hours).
- Blend all the ingredients in a high-speed blender for about 2 to 4 minutes or until completely smooth. The time depends on your blender, so feel free to process the mixture longer until you’re sure that it’s 100% smooth.
- Then, transfer the mixture into a bowl or container and refrigerate for 4 hours in the coldest spot or for up to 2 days in the average spot.
- Take it out of the fridge and start setting up the ice cream maker, including the frozen base of the machine.
- Pour the ice cream mixture in and churn accordingly based on the manufacturer’s settings. Usually, the machine calls for around 20 to 25 minutes of churning. Anyhow, the ice cream should be thick and smooth. If you don’t have access to an ice cream maker, see the notes down below.
- Transfer the soft-serve ice cream into a container and smoothen. Place either a cling wrap, parchment paper, or wax paper flat against the ice cream, then wrap the outside of the container too. This ensures that your ice cream will be protected from ice crystals. Freeze for at least 4 hours to set up or even overnight if you like. Nonetheless, feel free to skip this step if you want to enjoy soft-serve ice cream right after churning. Enjoy!
Notes
- If you don’t have access to an ice cream maker, you only have to do it until step 2. And, instead of refrigerating the mixture, freeze it for 1 hour, thereafter mixing it slightly every 20 minutes for 3 to 4 hours or until it’s firm enough to scoop.
- Do not substitute full-fat coconut milk with lite coconut milk or coconut milk powder. Lite doesn’t give enough fat and coconut milk powder isn’t creamy enough which leads to an icy ice cream instead of a smooth one.
- Although it’s tempting to speed up the chilling time of your ice cream base (the mixture), it’s important not to rush this step as this process sets much faster in the ice cream maker and leads to a far more creamy ice cream. Not to mention that it’s also easier to scoop. Totally worth the wait and effort!
- Likewise, it’s also important to cover your finished ice cream as per the instructions above. Otherwise, ice crystals will form quickly. I’m pretty sure you don’t want to bite on some small ice chunks when you’re eating your ice cream!
Nutrition
Love this recipe? Share your experience in the comments section below.